Sunday, December 29, 2024

Mushroom Duxelle

 It's Sunday Funday again, and this time round I'm going to share a favorite of mine.  

I don't think I've ever shared the fact that I love mushrooms, I'll cook up a package and just eat them, for breakfast, on toast with a piece or two of bacon.  OMG, one of my all time favorites.  

Mushroom Duxelle

This week, Camilla of Culinary Cam is hosting and asked us to come up with some nibbles for New Years Eve.   

My idea of a perfect New Years Eve is to stay home and party in my living room, with some good noshes.  And this is perfect, you can make it for yourself or bring it to a party or ?  you choose.   I'll be over here in the corner eating my contribution, well, I might share if you're good.   

I served this with my home made No-Knead bread, made into baguettes.   I first made this bread several years ago as part of a group that used to post once a month, called Secret Recipe Club.  I've probably made hundreds of loaves since that initial loaf.   I used to bake them and sell them at a local farmers market, and they've always been popular.  I make them now for myself, cause I like them.   Actually, I made some baguettes with my No-Knead recipe, baked, cooled and then sliced the bread and served it with the Duxelle.  BTW, this is pronounced Duke-sel, not duxxell.  I got corrected, when I told someone what it was.  

Mushroom Duxelle

Enough about the bread, you're here to make some of this lovely Mushroom Duxelle.  Cause you've got plans for New Years Eve, and need an amazing and surprisingly easy to make appetizer to bring.   Or to the last minute gathering, you just got invited to.  

BTW, this is usually what is wrapped around a Beef Wellington, underneath the puff pastry.  

To start with.   Pick up some lovely fresh mushrooms, make sure they pass the poke test and aren't spongy.  My personal thing, I like firm mushrooms, and not spongy ones.   I usually buy the white button mushrooms, mainly cause they're readily available and affordable. 

Wash and wipe off the mushrooms, cutting a thin slice off the stem and discarding it.  Then process the mushrooms in a food processor, along with the shallots, and garlic.   Then place the mixture in a fry-pan along with the butter and saute until all the moisture is gone from the mushrooms.  I like to add the fresh herbs at this point and stir them through.  But if I've used dried herbs, I'll put them in right away and let them kinda hydrate along with the cooking mushrooms.   

Mushroom Duxelle

They should be looking kinda like mushroom paste at this moment.  I do have to say, this is not a great looking dish, it's not all purty and bright, but gosh dang, it sure tastes amazing.  Serve them as I do with some lovely slices of baguette, or toasted crostini or even crackers if that's your vibe.     


Recipe next
Mushroom Duxelle on Toast

Mushroom Duxelle on Toast

Yield: 4-6
Author: Sid's Sea Palm Cooking adapted from many recipes
Prep time: 5 Min Cook time: 15 Min Total time: 20 Min
A festive fun appetizer or nosh for New Year's Eve or any special occasion - also great for a Beef or Veggie Wellington.

Ingredients

Mushroom Duxelle
  • 1 lb. fresh mushrooms - button, crimini or mixture of mushrooms
  • 1-2 shallots-
  • 1-2 cloves garlic
  • 4 tablespoons butter
  • 1-2 stalks fresh parsley - just the leaves, finely minced or chopped - you can also use fresh or dried thyme - 1-2 teaspoons if using fresh, or 1/2 tsp. if using dried thyme.
  • Salt and pepper to taste

Instructions

  1. Melt butter in large pan. Finely chop mushrooms, either by hand or in a food processor. I put the mushrooms in a food processor.
  2. Mince shallot/s and garlic and saute in pan with butter, until softened, but not browned. Add the finely minced/chopped mushrooms and cook over medium heat, stirring often until most of the liquid in the mushrooms has cooked off. This will take a while. It did for me. The mushroom mixture will be sticking a little on the pan by then, and will resemble a bit of a paste. Remove from heat and add finely chopped parsley, just the leaves and stir together. Taste a bit and add pepper and salt if desired. Serve on toast triangles, while warm, also tastes great cooled. This is perfect on fresh made baguettes, bruschetta or even slices of toasted homemade bread. The mixture will keep up to 4 days in the refrigerator and can be easily heated up again, in a buttered pan.


Did you make this recipe?
Tag @sidsseapalmcooking on instagram and hashtag it #Sidsseapalmcooking
I had some leftover Duxelle and froze it in small cubes, but before I did that, I added some to my brown gravy and served it over some leftover roast beef on top of a Yorkshire Pudding wrap.  That oomphed up the gravy to another level entirely.   I've actually been enjoying these wraps for awhile now.  
Roast Beef Yorkshire Wrap

Continue Reading
9 comments
Share:

Sunday, December 22, 2024

Candy Cane Bark

 It's Sunday Funday again, and I'm back for another round.    This time we're featuring Peppermint and there are lots of great ideas on what to make with it.   

I don't know about you, but I seem to collect Candy Canes, the little guys hang around long after Christmas, after their main job of dressing the Christmas Tree is done.   

Personally I like using them as a stir stick in a cup of hot cocoa, but you can only drink so many hot cocoa's and then you're done.  

So this year, I decided to sacrifice a few candy canes and make some candy cane bark.   I also bought some of those melting wafers and then googled how to make bark, and then basically winged it.   I also discovered I rather like that stuff, and had to give the leftovers away so I wouldn't eat more than I already had.   TMI? 

Candy Cane Bark


I also added some good dark chocolate to the chocolate type wafers to make them more chocolatey, is that a word?  All I know is I nibbled on quite a bit in a bid to make sure it tasted good.  

My original plan was to mix some crushed candy cane in with the vanilla flavored candy melts, but my initial try resulted in some weird looking stuff, so instead I spread it on top of the swirled melts and then added some Christmas sprinkles, cause 'It's Christmas'.  I also had a bit of the white vanilla spread left and decided to dip some pretzel sticks in there and again, 'It's Christmas' and since I had a few sprinkles left, they got coated as well.  I taste tested some, and had to stop myself cause those little suckers were delish.  

Candy pretzels

And the Candy Cane Bark, was pretty toothsome as well.  Next time I'll spread them out in a larger pan, cause it was a touch too thick, but it still tasted amazing. 

I'd never worked with Candy melts before but I googled and one suggestion I found was to mix good dark chocolate in with the chocolate flavored candy melts so I pulled out a bag of dark chocolate chips and went to town.  OK, so I melted them in with the chocolate, and dang, they worked. 

To start with, I took a few candy canes out and crushed them with my handy dandy meat mallet.    I did put them into a plastic bag first cause I didn't want little bits of peppermint permeating my kitchen.  I didn't crush them into powder, just enough to break them into little pieces.  

Candy canes

I lined an 8x8 inch pan (Next time I'll do a 9x13 pan) with a piece of parchment paper.  Set it aside. 

Next I measured out about 2 cups of the candy melts, into a heat proof measuring cup.  

Candy melts

Read the directions on the bag and proceeded to melt them in the microwave according to their directions.  Stirred it a bit, then added 1 cup of chocolate chips to it, stirred them  in until they melted.     Poured it into the prepared pan and spread it out evenly.  While that was cooling a bit, I melted the white chocolate bark, about 2 cups of the wafers, and poured it over the chocolate layer.  I used a toothpick to make swirls through the layers, but didn't mix them too much.  

Swirled melts

I then took the crushed candy canes, spread them evenly over the chocolate mixture, along with some Christmas sprinkles.  I pressed them very lightly into the surface of the bark, with another small sheet of parchment paper, and put them in the fridge to cool and set. 


Once they were set, I broke the bark into smaller pieces and put them into a plastic bag for later.  


 I had a little of the white vanilla melt left and decided to dip some pretzel rods into it, and put them aside on a parchment paper, and sprinkled the last of my Christmas sprinkles on them.  


And now to all the amazing people who participated today, here's what they made and the links to their creations.  

Continue Reading
12 comments
Share:

Sunday, December 1, 2024

Mini Berry Pies

 You might have noticed I'm not posting as much these days.   I keep meaning to make something I can share but get caught up in real life.  However, a group I'm a member of,  Sunday Funday, happened to post about the fact that December 1 is Pie Day, and I'm not talking the mathematical 'pi', but rather the eat until you can't eat no more pie, pie. 

Mini Berry Pies

Now, isn't that cutest little baby pie?  I thought so, then I ate it.  Cause I could and there was no one watching me.  

And as it just so happened, I had cooked up the most delicious fruit filling for pies and thought, I can share this, and have to admit that not only did I bake this luscious, unctuous berry filling into mini pies in my cute as a button, electric mini pie machine, but had also been enjoying the sauce on top of waffles, with some heavy cream on top and just plain as well.   And yes they did get a touch brown, but... 

Mini Berry Pies

  I also bake and sell various kinds of bread at a local market and decided to make some pies and bring them to sell.   These were the pies I made for the market and they were a hit.   I sold out fast on these.  And who could blame me.  Each one of these little beauties is about 2 1/2 bites, not even a whole slice of pie, so you can enjoy a couple almost guilt free.  Almost...
Mini Berry Pies

This past summer I got on a berry kick and was buying various kinds of berries to eat fresh, as a snack, and freezing what I didn't eat, so they wouldn't spoil.  I ended up with a lot of fruit in the freezer.   I also have the habit of weighing stuff, and writing on the freezer bag how much is in there, just in case I want to use it for a recipe later on. 

I even had a little pastry left over from the mini pies, from this batch of pies, so I did a slightly larger pie for later, and ummm, kinda bobbled it taking it out of the oven so it made a bit of a mess, but I'm eating it anyway.  So there. 

Mini Berry Pies


What can I say, my memory is shot, and it helps me to know just how much of anything I have in the freezer, cause I'm in the CRS stage of life.    Look it up, if you have to. 

To make a long story short, (er)  Here's what I did.  All the berries were frozen when I put them into the pot to cook. No water was added. 

Blueberries - 1.5 lbs

Cranberries -1 lb

Blackberries -8 oz

Raspberries 8 oz 

1 oz. Lemon Juice (frozen from my lemon tree)

3 + cups sugar - to taste

Cornstarch slurry

Add all the berries to the pot at once, then add the lemon juice and heat over low heat until the berries start to pop and let out their juice.  Raise the temperature and let come to a simmer, and simmer about 20 minutes.  Next add the sugar, starting with 1 cup, stir to dissolve and then add the second cup.  Taste for sweetness, and add another cup or more of sugar if needed.  (your sweetness level may be different from mine, I used about 3 1/2 cups of sugar).  Make up a cornstarch slurry, depending on how thick you want the sauce to be. I like mine on the thicker side, and have to admit I didn't measure really well. Start with 1 tablespoon cornstarch mixed in with 1/4 cup water, swirl into the sauce, let it come back to a boil, and check.  Add more cornstarch slurry if needed.  I did and ended up using 2 tablespoons of cornstarch.   Again, your mileage may vary.  

I also had lots of berry filling left, so I froze it in 2 tablespoon portions, using a silicone cube tray.  

And you can take the berry filling straight from the freezer and put it into the mini pies, but I would suggest thawing it first.  

I also use commercial pie pastry for this, as I find it a little more sturdy and that really helps the pies to come out of the pie cooker.  

I'm loving this little pie baker/appliance.  It bakes a pie in just about 15 minutes.  You can top the pie with a crust or not.  I've done it both ways.  I've also done a little weave on top, and they've come out nicely.   For me, they're perfect.  I can make pie, just for me, and freeze the rest for a snack later on.  I've been playing with different fillings and I think I like the Mixed Berry Filling the best.    

Hey, if you're going to indulge, ya gotta make it worth the calories...

Continue Reading
5 comments
Share:

Saturday, February 10, 2024

Quinoa Stuffed Zucchini

 When I saw the theme for this Sunday Funday event, I knew I had to share a dish I've been making for myself and others for awhile.

And the theme this week is Vegan Main Dishes.   

I'm there.  I first made this dish for a wedding I catered last year, and while I made more filling than needed for the one dish I served, I ate the filling with relish. OK, so not 'relish' per se, but I enjoyed the filling just on its' own.   It was that good.  But tucked into a zucchini, and baked, even better.  

Quinoa Stuffed Zucchini Boats

I almost feel virtuous eating this.  Almost, but I have to say it is totally delicious as well.  

I've made this as a Vegan Main dish, as well as a Vegetarian Main.  I like it both ways. 

 And as I said, you can make this Vegan or Vegetarian, simply by using either vegan Feta or regular feta as well as Vegan style Parmesan or regular Parmesan.  

I keep vegan butter on hand now.  I found out, it's really very versatile, and tastes great as well.  

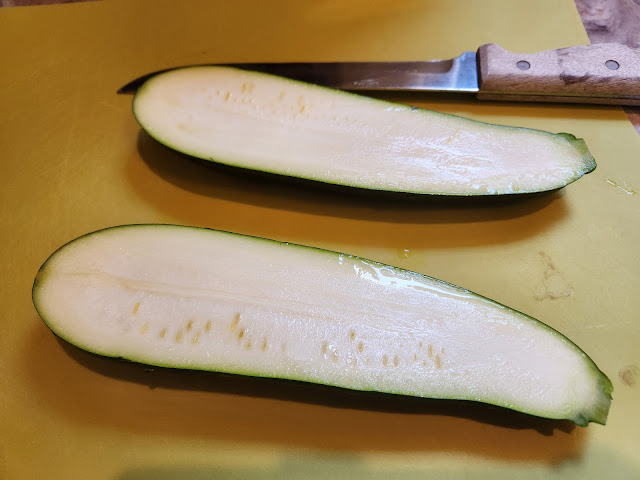
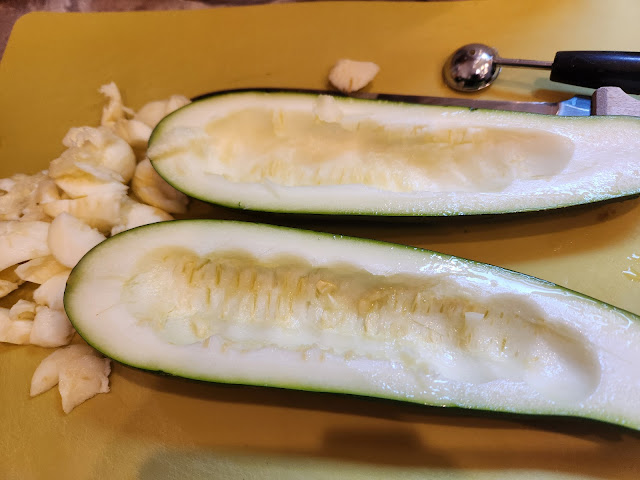
Here's the step by almost step directions.  I cut the zucchini in half, lengthwise, then score it, before taking the 'guts' out with my melon baller.

Halved Zucchini

  I like using the melon baller cause I feel like it gives me more control.  

Scored Zucchini

All scooped out and ready to get stuffed.

Scooped out and ready to go, zucchini boats

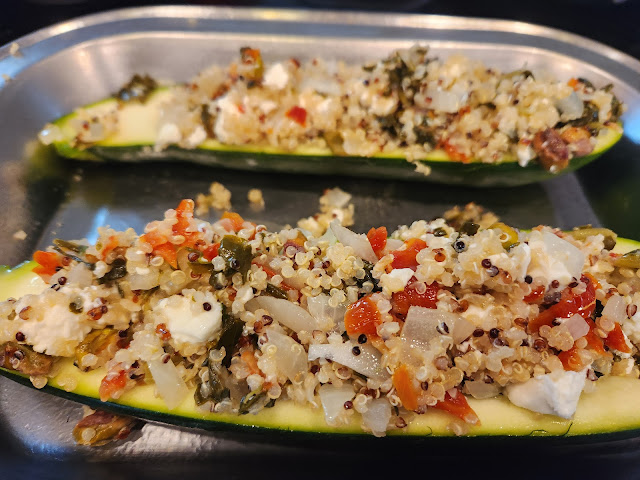
Ready for the party, or the oven, whichever comes first. 

Quinoa Stuffed Zucchini Boats


Quinoa Stuffed Zucchini

Quinoa Stuffed Zucchini

Yield: 2+
Author: Sid's Sea Palm Cooking adapted from many recipes
Each Zucchini will serve 2 people.

Ingredients

Filling
  • 1 small onion, diced
  • 2 cloves garlic, minced
  • 2 tablespoons vegan butter or olive oil
  • 2 cups cooked quinoa
  • 1/2 cup finely minced sun dried tomatoes (I used the jarred ones in olive oil)
  • 1/2 cup chopped collard greens or spinach
  • 1/4 cup chopped Kalamata olives or garlic stuffed green olives
  • 1-2 teaspoons fresh chopped oregano, optional
  • 1/2 cup feta cheese, either vegan or regular
  • 1/2 cup toasted pecans
  • 1/2 cup parmesan cheese - shredded - either vegan or regular

Instructions

Zucchini
  1. Prepare the Zucchini. Cut in half lengthwise, and cross hatch the seedy part on the inside, and scoop out the flesh, leaving a good 1/2 inch thickness on the sides and bottom. Reserve the scooped-out flesh for soup or stir fry.
  2. Salt the zucchini, lightly and set aside for about 15 minutes. Then take the zucchini and rinse it under some running water to get rid of the salt. Set aside while you prepare the filling.
Filling
  1. Saute the onion and garlic in either the olive oil or vegan butter, until translucent. Add in the cooked quinoa, tomatoes, nuts, oregano, and olives. Heat through then add the cheeses. Mound the filling into the zucchini halves and bake in a preheated 350 degree oven for about 25 minutes.
  2. Serve and enjoy.

Estimate only

Did you make this recipe?
Tag @sidsseapalmcooking on instagram and hashtag it #Sidsseapalmcooking

Sunday Funday

Vegan Main Dishes


Continue Reading
6 comments
Share:

Sunday, January 21, 2024

Old fashioned Cream Dressing for Salads

 I actually posted about this dressing a few years ago, but I've since played with it a lot.  I've mixed various vinegar's in with it, and changed the flavors up quite a bit.  

Why am I talking about this again?  Well, it's time to get back into the baking/cooking saddle again and I'm part of a group that posts fun stuff, called Funday Sunday.

So here it is:   

Well, mostly here it is.  As I said I've played with it a lot, and changed it up and gotta say, that the original way is still the most tasty way, although, there is one that came pretty close.  

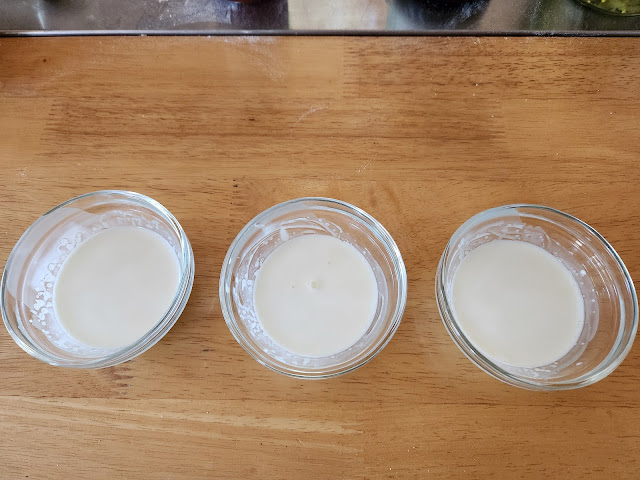
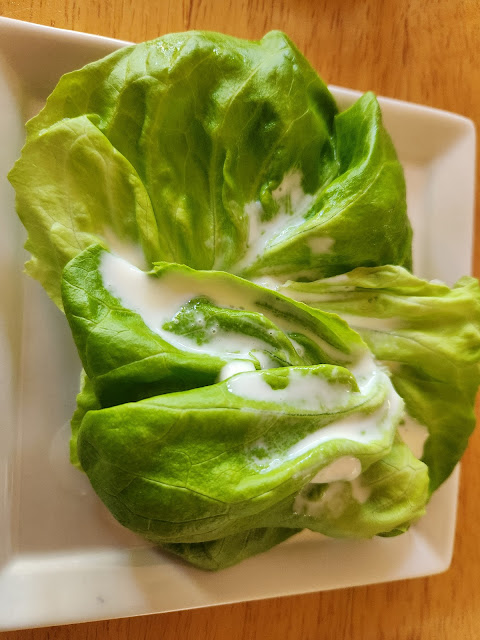
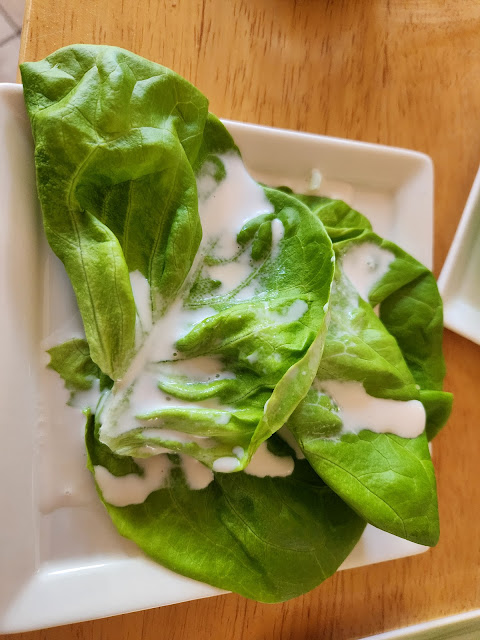
I actually made up four separate batches of this, measuring out each one, and here they are from worst (IMHO) to best.    I had some Bibb Lettuce and took out three leaves for each plate.   I also used the 'winners' on a lettuce and tomato salad.  Just for fun, and since I had some in the fridge, I decided it might be fun to try.

I'm using a lot of Monkfruit sweeteners these days, so decided to use it in place of the sugar in the original recipe.  And ummm, while it tasted good, I think real sugar might just be the way to go here.

I used the same quantity on each one.   1 1/2 tablespoons heavy cream - 1/2 teaspoon Monkfruit sweetener, and 1 tablespoon each of the various vinegar's.    This taste test was fun too.  And I ate my veggies along the way. 

Cream Salad Dressings

First one I did was using the pickling liquid from a jar of Kalamata Olives.  This was a major miss.  Meh on the taste.  If I'd added some finely minced Kalamata olives, I bet it would have tasted better. 

Cream Dressing with Kalamata


The second I used the pickling liquid from a jar of pickled beets, and wow was it colorful.  It also had a lovely flavor, not quite beet, but nice.  

Beet Cream Dressing


The third one I used the pickling liquid from a jar of Bread and Butter Pickles.   Not much flavor from the pickles, but still not bad.

Cream Dressing with Bread and Butter liquid


The last one, was the more traditional dressing.  Again, I used the same measurements for each one.  This one I used Rice Wine Vinegar and a half teaspoon of real sugar.  This dressing thickened the most and was more of a vinaigrette dressing.  

Classic Cream Dressing

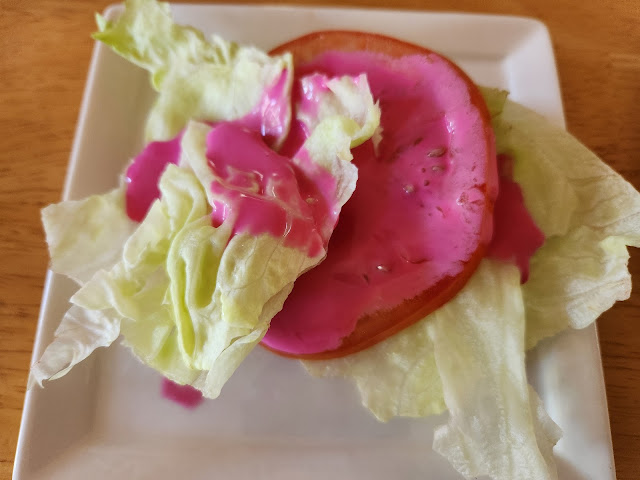
I then decided to try two of the dressings out on a simple lettuce and tomato salad.  Well, the two that I decided were the most flavorful. 
The classic on sliced tomato and lettuce.  It had more of a vinaigrette leaning and honestly, tasted pretty darn good.  I think you could add fresh herbs to this, to take it over the top again. 


Classic Cream Dressing on Lettuce and Tomato

And the beet one.  Which while it tasted ok, it just did not look right.  The pink of the beet clashed and fought with the red of the tomato.  I guess you could eat this one in the dark, but...

Cream Beet Dressing on Lettuce and Tomato Salad

Take a look at some of the other fun dressings the Sunday Funday group shared.


Palatable Pastime: Blue Cheese Salad Dressing 

Mayuri's Jikoni: Cranberry Salad Dressing 

A Day in the Life on the Farm: Homemade Celery Seed Dressing 

Sneha's Recipe: Keto Vegan Passion Fruit Sour Cream Dressing 

Amy's Cooking Adventures: Chicken Caesar Salads with Homemade Caesar Dressing 

Bloggetti: Easy Homemade Greek Salad Dressing 

Sid’s Sea Palm Cooking: Old-Fashioned Cream Dressing for Salads 

Culinary Cam: Basic Vinaigrette and Variations

Continue Reading
3 comments
Share: